Add image based geolayer
This task explains how to create an image based geolayer.
Before you start to create an image based geolayer you should upload the image in the
![]() Admin →
Customization → Images → Custom geolayers folder.
Admin →
Customization → Images → Custom geolayers folder.
Procedure
- Go to the geolayers admin page as explained in this task.
-
Click the
 button to open the geolayer detail page:
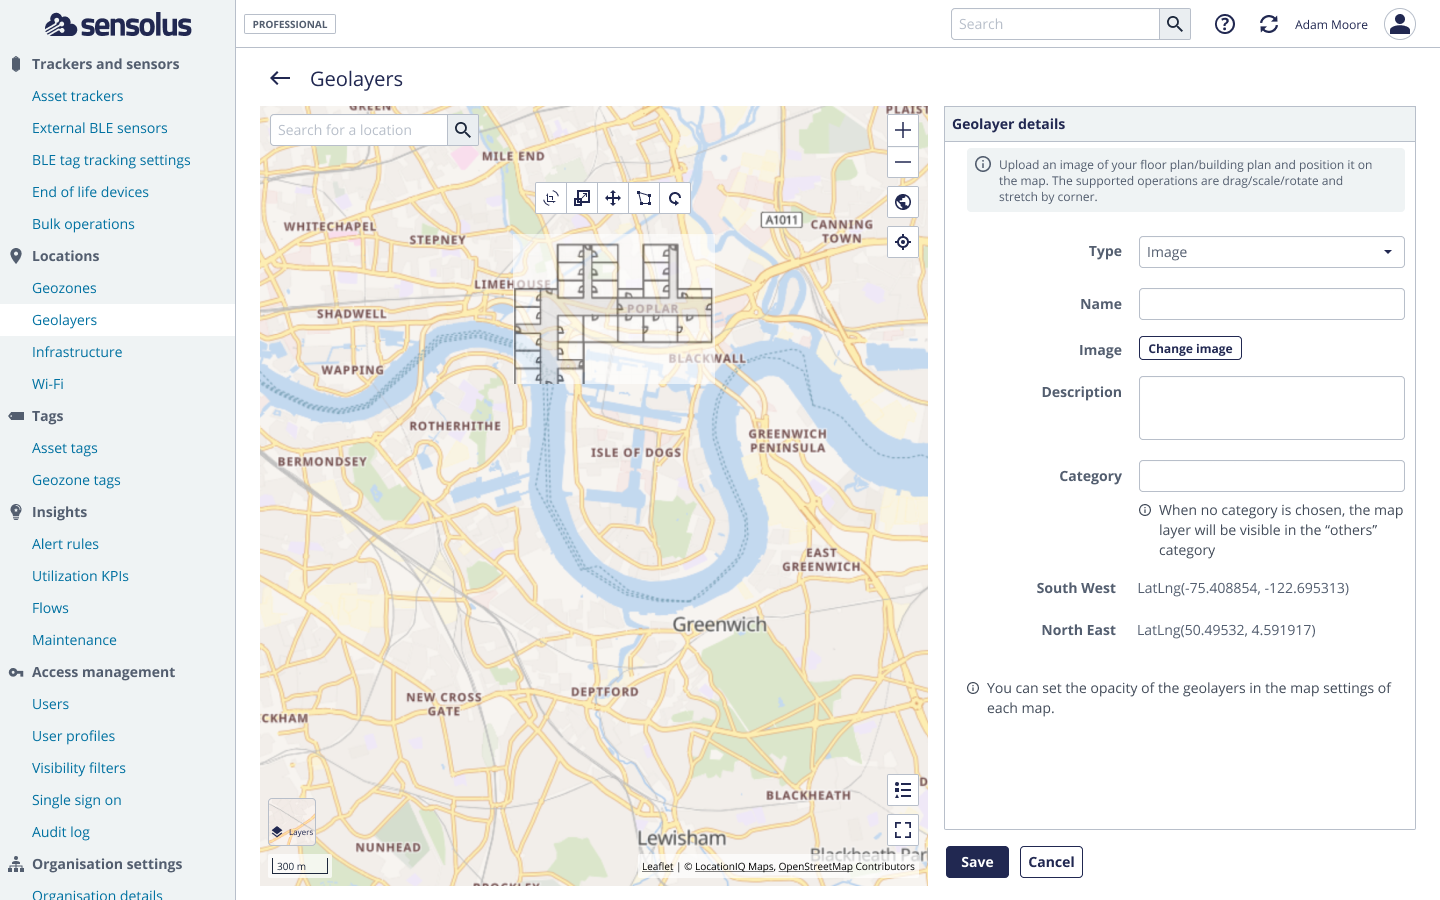
- In the type drop-down menu, choose IMAGE.
- Enter a meaningful name. This name will be displayed for enabling/disabling the geolayer on the map.
- Using the left map panel, navigate to where you want to position the overlay.
-
Select the image using the file chooser. Most standard formats, such as JPG,
PNG, are supported. The image will appear in the center of the map.
Note: The South west and North east coordinates fields will be filled in automatically.
- Give the geolayer a category name (you are free to choose the name). All geolayers with the same category will appear under the same category title in the geolayer map settings overlay. When no category is entered the geolayer will appear under the category "others" in the geolayer map settings overlay.
-
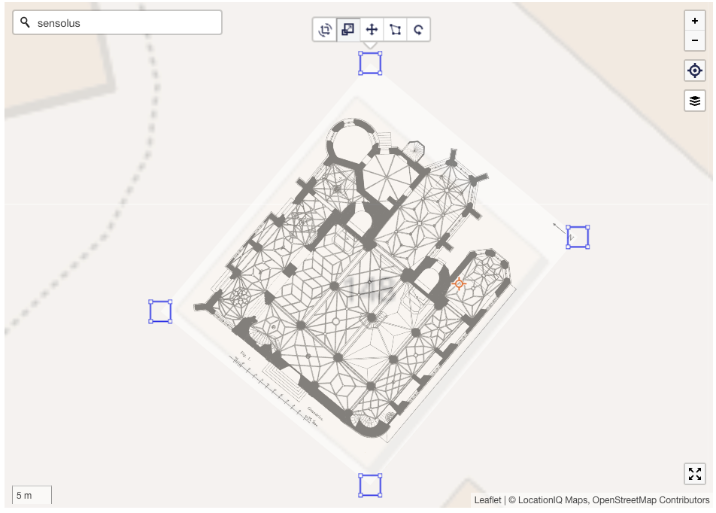
To further improve the accurate positioning of the overlay, click on the image in the
map panel. While selected, the button controls allow to rotate, scale, drag and distort
the geolayer image.
-
Click
 to
confirm the geolayer settings.
to
confirm the geolayer settings.